本篇記錄透過 CSharp,使用 selenium 進行 e2e 測試的一些心得,因此會比較雜亂,未來可能會、也可能不會再整理
使用 selenium 2 進行 e2e 測試#
主要是基於 selenium 2 進行自動化測試;關於 selenium 1、selenium 2,這兩種都可以拿來寫自動化測試;他們的差別最簡單的就是 selenium 1 主要是提供一堆 API 讓你去操作;而 selenium 2 則是提供物件,讓你用物件的方法去撰寫測試。
Selenium WebDriver for Chrome , 過時的作法#
先到ChromeDriver - WebDriver for Chrome下載跟你電腦上版本一樣的 Driver,下載後解壓縮到自訂目錄,最好該目錄有設定進去path環境變數
然後在專案內初始化 webDriver 的時候就可以用
Sample Code for Create ChromeDriver#
string seleniumExePath = ConfigurationManager.AppSettings["SeleniumExePath"];
int waitSec = ConfigurationManager.AppSettings["SeleniumWaitSec"].ToInt();

_driver = new ChromeDriver(ChromeDriverService.CreateDefaultService(seleniumExePath));
// 全螢幕
_driver.Manage().Window.Maximize();
// 等待秒數
_driver.Manage().Timeouts().ImplicitWait = TimeSpan.FromSeconds(waitSec);app.config#
<configuration>
    <appSettings>
        <add key="SeleniumWaitSec" value="20" />
        <add key="SeleniumExePath" value="c:\Tools" />
    </appSettings>
</configuration>
關於 Selenium WebDriver for Chrome , 目前的作法#
後來才發現原來可以用nuget套件去安裝chromedriver就夠了,且初始化 Driver 的部分也很簡單,所以特別在這邊補充一下,先貼給大家看我目前使用的nuget套件
一切直接都用 nuget 安裝就搞定,不需要在自己下載 exe 執行,方便許多
<?xml version="1.0" encoding="utf-8"?>
<packages>
  <package id="DotNetSeleniumExtras.PageObjects" version="3.11.0" targetFramework="net452" />
  <package id="DotNetSeleniumExtras.PageObjects.Core" version="3.12.0" targetFramework="net452" />
  <package id="DotNetSeleniumExtras.WaitHelpers" version="3.11.0" targetFramework="net452" />
  <package id="Selenium.Support" version="3.141.0" targetFramework="net452" />
  <package id="Selenium.WebDriver" version="3.141.0" targetFramework="net452" />
  <package id="Selenium.WebDriver.ChromeDriver" version="86.0.4240.2200" targetFramework="net452" />
</packages>
如此一來,初始化 webDriver 就只需要using OpenQA.Selenium.Chrome;,然後new ChromeDriver();就好了
安裝 nuGet 套件#
Selenium.SupportSelenium.WebDriver
第一個套件是因為有用到SelectElement這個類別所以安裝;主要是第二個套件
使用上也很簡單,下面的例子就是一個抓頁面 DOM 然後輸入帳號密碼並送出的範例
Driver.FindElement(By.Id("account")).SendKeys(account);
Driver.FindElement(By.Id("password")).SendKeys(password);
Driver.FindElement(By.Id("submit")).Click();
語法應該不難理解,細節就請自行查閱 API 語法囉
好用的輔助開發工具 XPath Helper#
既然是 e2e 測試,選取畫面上的元素是很重要的事情,相信沒有多少人會去自己寫xpath這種東西
大部分的人應該都是透過開發者工具(F12)叫出來,然後透過Ctrl+Shift+C選取畫面上的元素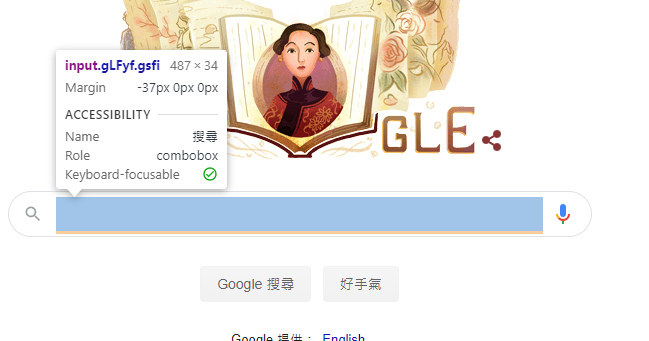
選取後在開發者工具上會反白出來,再將滑鼠移過去,右鍵選擇複製 XPATH
但是,要如何驗證呢?
安裝這一套XPath Helper就可以了,裝好後點 ICON 會出現一個半透明的輸入框,將 XPATH 於此處貼上,符合的元素在畫面上會顯著的顯示出來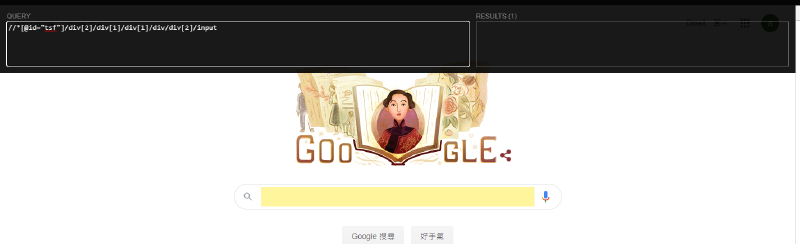
產生單元測試報告#
0. 事前準備#
設定環境變數 Path,方便在指令列直接打指令,可參考:設定環境變數
| 執行檔案 | 實際路徑 |
|---|---|
| msbuild.exe | C:\Program Files (x86)\Microsoft Visual Studio\2019\Community\MSBuild\Current\Bin\MSBuild.exe |
| vstest.console.exe | C:\Program Files (x86)\Microsoft Visual Studio\2019\Community\Common7\IDE\CommonExtensions\Microsoft\TestWindow\vstest.console.exe |
| TrxerConsole.exe | 自行 下載 後找地方放 |
trxerConsole.exe執行若有錯誤,需要下載原始碼自己修改,如下圖的地方,將它替換掉,重新編譯後即可
public string RemoveAssemblyName(string asm)
{
    if(asm.IndexOf(',')>0) {
        return asm.Substring(0,asm.IndexOf(','));
    } else {
        return asm;
    }
}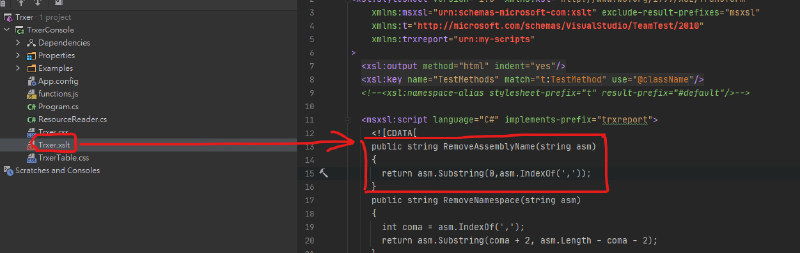
REF:Unhandled Exception: System.ArgumentOutOfRangeException: Length cannot be less than zero
1. 產生 dll 檔案#
測試專案先建置,產生測試的 dll 檔案
## 進入專案目錄
cd D:\code\Github\Repos\SeleniumSpecflow\SeleniumSpecflow
## 重新建置測試專案
msbuild /p:Configuration=Debug /t:Rebuild SeleniumSpecflow.csproj
2. 產生 trx 報告#
使用vstest.console.exe執行測試並產生trx格式的報告檔案,產生路徑在專案根目錄下TestResults的這個子目錄內
## 進入專案目錄
cd D:\code\Github\Repos\SeleniumSpecflow
## 執行測試
vstest.console.exe /Logger:trx;LogFileName=e2e.trx "SeleniumSpecflow\bin\Debug\SeleniumSpecflow.dll"
因為希望測試目錄的階層是在專案根目錄下,因此在這個目錄下執行測試,它會自動建立一個子目錄
TestResults用來存放測試結果trx檔案
3. 產生 html 報告#
使用TrxerConsole.exe將測試報告轉為html格式
trxerConsole.exe D:\code\Github\Repos\SeleniumSpecflow\TestResults\e2e.trx4. 檢視報告內容#
透過指令列自動開啟html報告
start chrome.exe D:\code\Github\Repos\SeleniumSpecflow\TestResults\E2E.trx.html使用 specflow 套件撰寫 BDD 風格的 cucumber 測試文件#
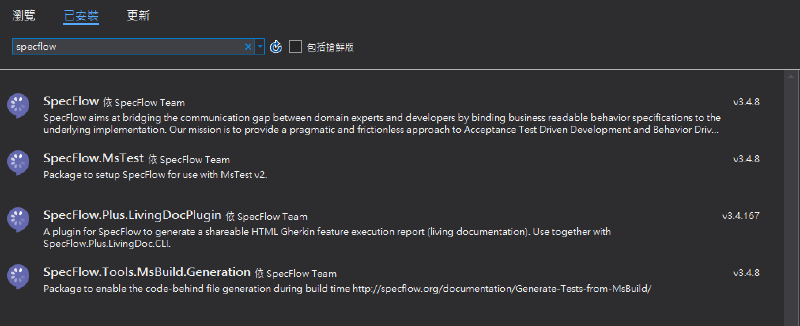
像上面這樣的測試案例,是可以直接被執行的,首先需要安裝 VS2019 支援的 SpecFlow 擴充套件,可以從這邊SpecFlow for Visual Studio 2019下載;另外,在專案內也需要安裝SpecFlow套件,最好是裝新版本;在 IDE 的部分因為在 Rider 內還沒有支援 C# 的 SpecFlow,所以比較友善的開發環境還是在 Visual Studio 2019 之內
在 VS2019 內若採用MSTEST的測試框架,那麼最好還是安裝一下
SpecFlow.MsTestSpecFlow.Tools.MsBuild.Generation
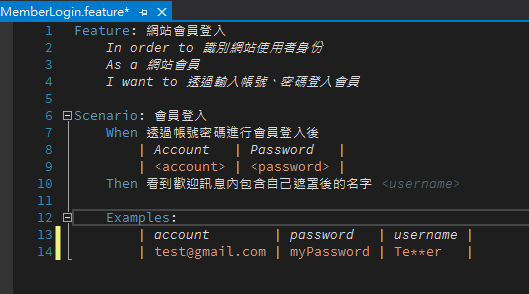
specFlow 的 Feature 檔其實只是一個純文字的格式,透過套件當你在 Build 的時候,自動產生一個對應的 cs 檔,自動產生出來的檔案不需要加入專案,在測試總管可以看到產生出來的測試案例
如何開始自動產生步驟定義#
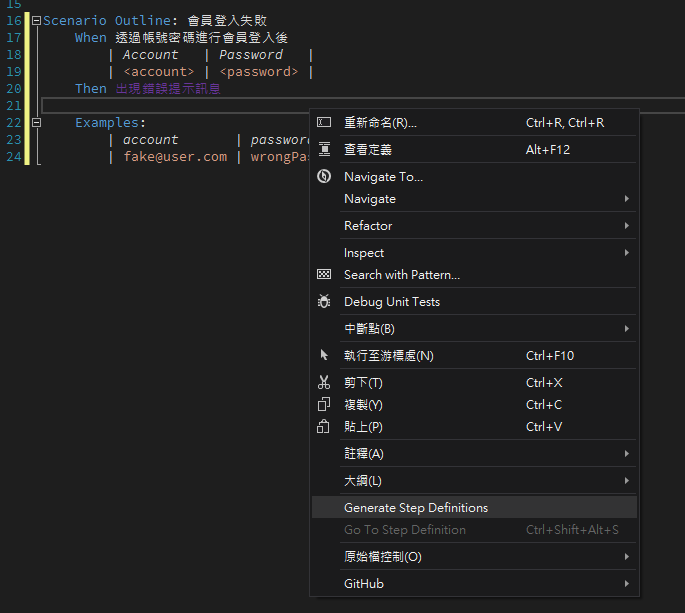
feature檔,無法找到定義的部分會以紫色顯示,可以右鍵選單執行Generate Step Definitions
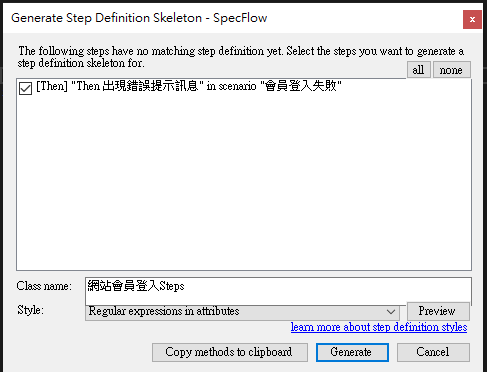
Generate之後會產生一個檔案存放相關的定義,需要你自行選擇儲存位置;若是補足案例的定義,建議是選擇旁邊的複製到剪貼簿,自己找到程式碼的地方貼上修改
如果沒有步驟定義的產生選項可以選,應該就是專案沒有參考到正確的dll檔案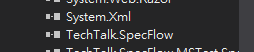
在.netFramework 4.6.1 上面是這個樣子,更高的版本似乎不會在專案目錄下有
packages,而是在使用者目錄下面共用,這部分就沒有再去研究
注入 ScenarioContext#
使用新版本的SpecFlow需要用注入的方式取得ScenarioContext,但是透過產生的語法是直接給ScenarioContext.Current.Pending()類似這樣的方式。其實就只需要在 Steps 定義檔案的建構式,直接注入ScenarioContext即可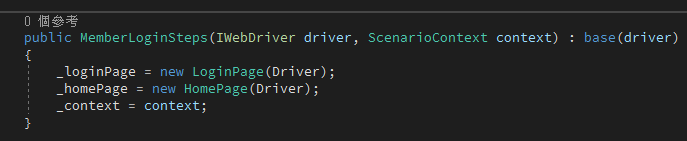
透過 page object model 撰寫測試#
我們為頁面新增加一個 model,稱之為 page object,在這個物件內新增一些屬性,讓我們可以直接呼叫使用,而不必每一次都重新抓,當然也可以將一些頁面的操作行為封裝起來,讓我們在使用上更加方便、直觀
安裝這四個 nuget 套件
Install-Package DotNetSeleniumExtras
Install-Package DotNetSeleniumExtras.PageObjects
Install-Package DotNetSeleniumExtras.PageObjects.Core
Install-Package DotNetSeleniumExtras.WaitHelpers
在程式內 using 正確的命名空間
// For supporting Page Object Model
// Obsolete - using OpenQA.Selenium.Support.PageObjects;
using SeleniumExtras.PageObjects;
在物件內就可以這樣宣告,意思是透過 By.Id 的方式去尋找"loginID",找到的東西放到 TxtAccount 內
    [FindsBy(How = How.Id, Using = "loginID")]
    public IWebElement TxtAccount { get; set; }
當然也可以將 Login 行為封裝在 pageObj 裡面的方法,在這裡會造成頁面切換跳轉的部分,則是返回另外一個pageObj
public HomePage Login(string account, string password)
{
    TxtAccount.SendKeys(account);
    TxtPassword.SendKeys(password);
    BtnSubmit.Submit();
    return new HomePage();
}
但是在使用這樣的方法之前必須要先經過 Init 的步驟,否則所有去抓頁面的東西都會是 null 在這裡我採用的方式是在 Base 的建構式內初始化
    public static class PropertiesCollection
    {
        public static IWebDriver Driver { get; set; }
    }

    public abstract class PageBase
    {
        protected PageBase()
        {
            PageFactory.InitElements(PropertiesCollection.Driver, this);
        }
    }

    public class LoginPage : PageBase
    {
        [FindsBy(How = How.Id, Using = "loginID")]
        public IWebElement TxtAccount { get; set; }

        [FindsBy(How = How.Id, Using = "password")]
        public IWebElement TxtPassword { get; set; }

        [FindsBy(How = How.Id, Using = "login")]
        public IWebElement BtnSubmit { get; set; }

        public HomePage Login(string account, string password)
        {
            TxtAccount.SendKeys(account);
            TxtPassword.SendKeys(password);
            BtnSubmit.Submit();
            return new HomePage();
        }
    }
而 PropertiesCollection.Driver這個東西則是在 Hook 內測試開始後初始化
// Hooks.cs
[BeforeScenario]
public void Initialize()
{
    PropertiesCollection.Driver = new ChromeDriver();
}
REF
- Selenium C#: Page Object Model Tutorial With Examples
- Execute Automation - Selenium with C# - Youtube
- Selenium: PageFactory - Github
產生 cucumber 的測試報告#
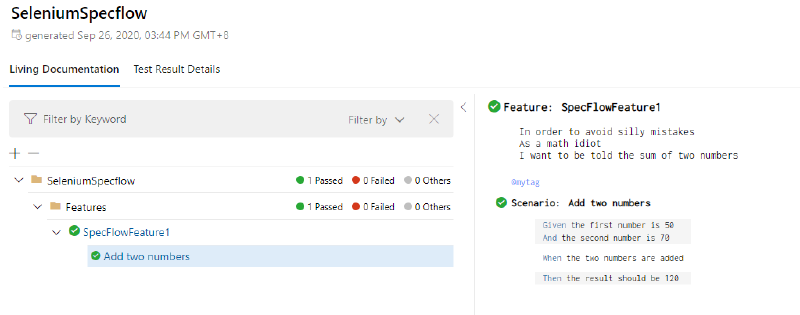
LivingDoc#
專案如果有安裝了SpecFlow.Plus.LivingDocPlugin,會在 Bin 目錄下產生一個測試結果的 json 檔案,所以我們只要透過官方提供的另外一個工具livingdoc.exe,將 json 轉為 Html 報告即可
更新 Specflow 套件至 3.4.3 以上#
安裝 SpecFlow.Plus.LivingDoc.CLI#
SpecFlow.Plus.LivingDoc.CLI需要安裝.NET Core SDK 3.1或更高版本。可以在 Microsoft 官方指南中找到有關設置.NET Core SDK 的信息。雖然產生報告是透過 dotnet core 的工具,但是這個工具只是為了將 json 檔案轉為 html,實際上跟你專案採用.netFramework 或是.net core 無關
dotnet tool install --global SpecFlow.Plus.LivingDoc.CLIREF:Installing the command line tool
在安裝了套件之後,執行測試也會一併產生FeatureData.json供後續產生報告使用,如此一來,就可以直接輸入 livingdoc <Path to FeatureData.json>這樣的指令在執行目錄下產生報告
設定 Visual Studio 2019 外部工具執行產生報告#
使用TrxerConsole.exe將測試報告轉為html格式
livingdoc D:\code\Github\Repos\SeleniumSpecflow\SeleniumSpecflow\bin\Debug\FeatureData.json為了方便使用,將產生報告的指令撰寫成批次檔案,存放在某個路徑下,並透過 VS2019 的外部工具去呼叫該批次檔,同時傳入參數
livingdoc.exe %1
START Chrome LivingDoc.html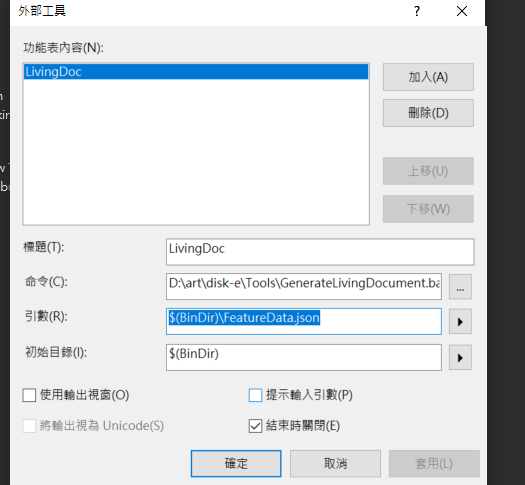
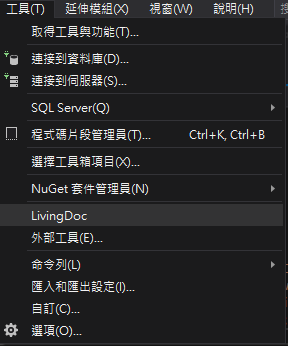
如此一來就可以直接在 Menu 選擇外部工具,並產生報告觀看了
REF:Introducing the SpecFlow+ LivingDoc Generator
ExtentReport#
雖然比較好看,但是實際用了之後感覺好像沒有比較好,有興趣的人還是可以自行比較看看,我覺得優點的部分也是缺點,他的報告內容其實是需要自己去建立的,所以喜歡客製的人或許可以塞很多自己要看的內容?不過我沒有那麼勤勞,報告有看到我要看到的指標就好了;另外這個方法需要用到mongoDB,所以再測試的時候也是自己先把它用 docker 建起來;這個報告我沒有花很多時間查,主要是看人家的 sample code 直接抓來用,所以也不會特別說甚麼,直接貼相關 Code 就好了;有興趣的人再自行研究囉
using System;
using System.Configuration;
using System.Globalization;
using System.IO;
using AventStack.ExtentReports;
using AventStack.ExtentReports.Gherkin.Model;
using AventStack.ExtentReports.Reporter;
using BoDi;
using OpenQA.Selenium;
using OpenQA.Selenium.Chrome;
using OpenQA.Selenium.Remote;
using TechTalk.SpecFlow;

namespace SeleniumSpecflow
{
    [Binding]
    public class Hooks
    {
        //Global Variable for Extend report
        private static ExtentTest _featureName;
        private static ExtentTest _scenario;
        private static ExtentReports _extent;
        private static KlovReporter _klov;

        private RemoteWebDriver _driver;

        private readonly IObjectContainer _objectContainer;
        public Hooks(IObjectContainer objectContainer)
        {
            _objectContainer = objectContainer;
        }

        [BeforeTestRun]
        public static void InitializeReport()
        {
            string reportPath = GetReportPath();
            //Initialize Extent report before test starts
            var htmlReporter = new ExtentHtmlReporter(reportPath);
            htmlReporter.Configuration().Theme = AventStack.ExtentReports.Reporter.Configuration.Theme.Dark;

            //Attach report to reporter
            _extent = new ExtentReports();
            _klov = new KlovReporter();

            _klov.InitMongoDbConnection("localhost", 27017);
            _klov.ProjectName = "ExecuteAutomation Test";
            // URL of the KLOV server
            _klov.KlovUrl = "http://localhost:5689";
            _klov.ReportName = "Karthik KK" + DateTime.Now.ToString(CultureInfo.InvariantCulture);

            _extent.AttachReporter(htmlReporter, _klov);
        }

        private static string GetReportPath()
        {
            // project/bin/debug
            string binDir = Directory.GetCurrentDirectory();
            // project
            string projectDirectory = Directory.GetParent(binDir).Parent?.Parent?.FullName;
            // project/ExtentReport.html
            return Path.Combine(projectDirectory, "ExtentReport.html");
        }

        [AfterTestRun]
        public static void TearDownReport()
        {
            //Flush report once test completes
            _extent.Flush();
        }

        [BeforeFeature]
        public static void BeforeFeature(FeatureContext featureContext)
        {
            //Create dynamic feature name
            _featureName = _extent.CreateTest<Feature>(featureContext.FeatureInfo.Title);
        }

        [AfterStep]
        public void InsertReportingSteps(ScenarioContext context)
        {
            //Pending Status
            if (context.ScenarioExecutionStatus == ScenarioExecutionStatus.StepDefinitionPending)
            {
                switch (context.CurrentScenarioBlock)
                {
                    case ScenarioBlock.Given:
                        _scenario.CreateNode<Given>(ScenarioStepContext.Current.StepInfo.Text).Skip("Step Definition Pending");
                        break;
                    case ScenarioBlock.When:
                        _scenario.CreateNode<When>(ScenarioStepContext.Current.StepInfo.Text).Skip("Step Definition Pending");
                        break;
                    case ScenarioBlock.Then:
                        _scenario.CreateNode<Then>(ScenarioStepContext.Current.StepInfo.Text).Skip("Step Definition Pending");
                        break;

                }

                return;
            }

            // step success
            if (context.TestError == null)
            {
                switch (context.CurrentScenarioBlock)
                {
                    case ScenarioBlock.None:
                        break;
                    case ScenarioBlock.Given:
                        _scenario.CreateNode<Given>(ScenarioStepContext.Current.StepInfo.Text);
                        break;
                    case ScenarioBlock.When:
                        _scenario.CreateNode<When>(ScenarioStepContext.Current.StepInfo.Text);
                        break;
                    case ScenarioBlock.Then:
                        _scenario.CreateNode<Then>(ScenarioStepContext.Current.StepInfo.Text);
                        break;
                }

                return;
            }

            // step fail
            switch (context.CurrentScenarioBlock)
            {
                case ScenarioBlock.Given:
                    _scenario.CreateNode<Given>(ScenarioStepContext.Current.StepInfo.Text).Fail(context.TestError.InnerException);
                    break;
                case ScenarioBlock.When:
                    _scenario.CreateNode<When>(ScenarioStepContext.Current.StepInfo.Text).Fail(context.TestError.InnerException);
                    break;
                case ScenarioBlock.Then:
                    _scenario.CreateNode<Then>(ScenarioStepContext.Current.StepInfo.Text).Fail(context.TestError.Message);
                    break;
            }
        }

        [BeforeScenario(Order = 0)]
        public void Initialize(ScenarioContext context)
        {
            InitBrowser();
            //Create dynamic scenario name
            _scenario = _featureName.CreateNode<Scenario>(context.ScenarioInfo.Title);
        }

        [AfterScenario(Order = 1000)]
        public void CleanUp()
        {
            _driver.Quit();
        }

        internal void InitBrowser()
        {
            string seleniumExePath = ConfigurationManager.AppSettings["SeleniumExePath"];
            int waitSec = ConfigurationManager.AppSettings["SeleniumWaitSec"];

            _driver = new ChromeDriver(ChromeDriverService.CreateDefaultService(seleniumExePath));
            _driver.Manage().Window.Maximize();
            _driver.Manage().Timeouts().ImplicitWait = TimeSpan.FromSeconds(waitSec);

            _objectContainer.RegisterInstanceAs<IWebDriver>(_driver);
        }

    }
}
SpecRun Report#
更新到 SpecFlow + Runner
- Remove the SpecFlow.MsTest NuGet package from your project
- Add the SpecRun.SpecFlow NuGet package to your project
- Build your project
REF:Migration to SpecFlow+ Runner
做完上面的步驟你在 IDE 裏面是看不到任何測試的,也不知道怎麼一回事,後來到【輸出】視窗去看才知道必須要先註冊免費的帳號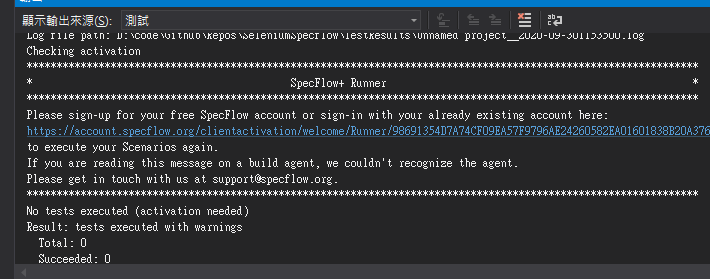
點連結,透過 Microsoft 登入並註冊 specflow 帳號,完畢之後會說可以用了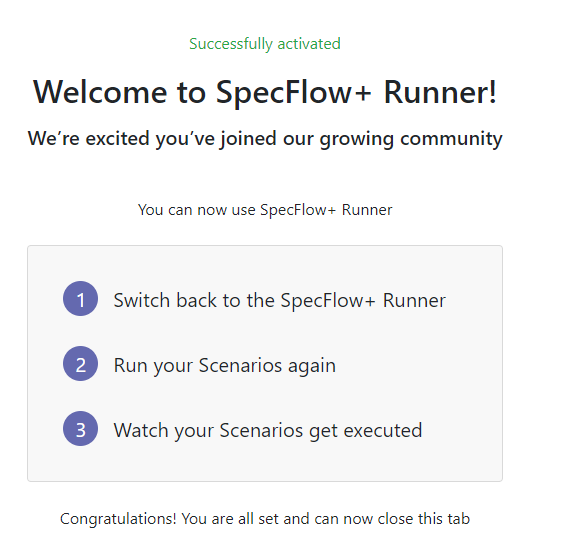
不得不提,他的報告真的很醜,但是資訊跟功能著實讓我驚豔,原本的測試失敗了就是失敗了,我需要手動執行,但是他居然會失敗後幫你 retry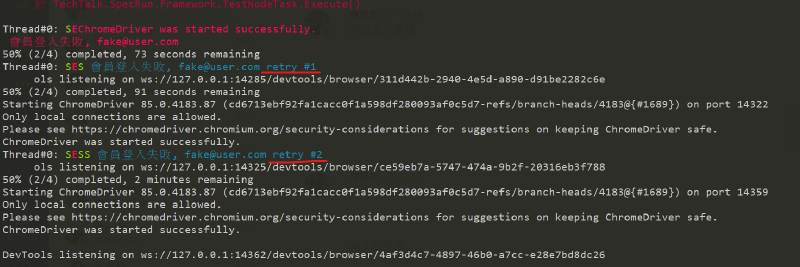
做完這些動作後我的測試總管似乎壞掉了,經由 StackOverFlow 的這篇討論,我想嘗試照著做,發現沒有該暫存目錄,最後我關閉 VS2019 所有實體後,重新開啟專案,重新建置後順利看到所有測試案例
它會在專案的目錄下建立一個runtests.cmd,需要測試的時候直接跑這個 command 就可以了,報告會在跑完測試的時候一併產生,連結可以從 VS2019 的輸出視窗看到,直接點擊就可以看到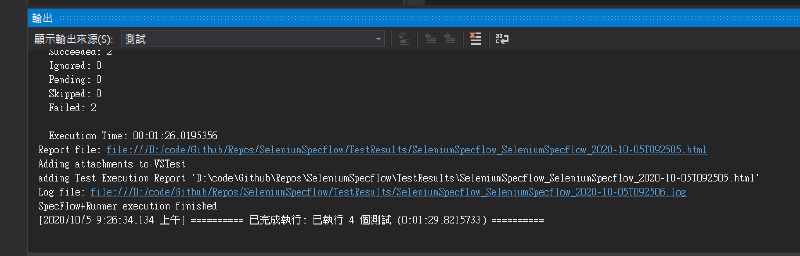
如何設定測試#
參閱官方網站的說明,在使用 SpecFlow + Runner version 3.0.284 以後的版本,預設如下
- Search for tests in the base folder (i.e.
bin/Debugorbin/Debug/<Framework>) when using SpecRun.exe for test execution - Execution configuration element:
- testThreadCount is 1
- stopAfterFailures is 3
- testSchedulingMode is Sequential
如果要變更設定,需要新增.srprofile設定檔進行設置
自行編輯報告 Template#
請參閱官方的Tutorial: Customizing Reports文件
要使用自訂的 Template,必須要先將報告的 template cshtml 文件,從 nuget 目錄下面 copy 到專案目錄並加入專案,然後在專案的屬性視窗,選擇一律複製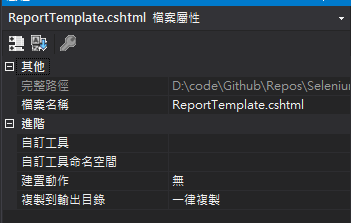
接著依照官網的建議設定,如果只需要產一份報告的,就利用Setting提到的reportTemplate;如果要產多份報告的,就利用Report裡面的Template標籤,文件內都有範例可參考