這篇文章主要是為了記錄使用 NPOI 的方法及踩坑經驗,更細節還是請移步官網
NPOI 的安裝#
使用nuget搜尋NPOI套件並安裝即可,做完這件事情後查看專案檔,可以看到他一共安裝三個套件
<!--package.config-->
  <package id="NPOI" version="2.5.1" targetFramework="net452" />
  <package id="Portable.BouncyCastle" version="1.8.6" targetFramework="net452" />
  <package id="SharpZipLib" version="1.2.0" targetFramework="net452" />
如何開始 Quick Start#
通常我們使用 NPOI 的步驟大概會是這個樣子
- 建立 EXCEL 檔案:從概念上講就是先建立一個工作本(WorkBook)
- 建立工作表:這個就是工作本裡面的某一頁(Sheet)
- 設定儲存格資料:沒甚麼好講的,就是每一頁面底下的儲存格
建立 EXCEL 檔案#
因為 EXCEL 版本的關係,官方提供兩個類別來建立工作表
| 版本 | 副檔名 | 類別 |
|---|---|---|
| Excel 2003 | xls | HSSFWorkBook |
| Excel 2007 | xlsx | XSSFWorkbook |
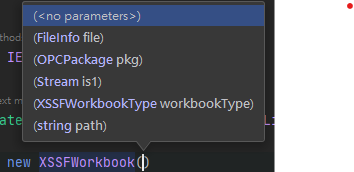
IWorkbook target = new XSSFWorkbook();在搜尋NPOI用法的時候,有看到另外一個工廠方法,但是最終我並沒有使用這個方法,而是直接寫死,用XSSFWorkbook,因為需求僅需要使用xlsx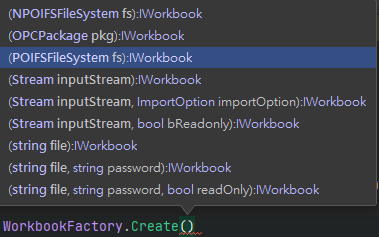
建立工作表#
應該說這個步驟,要看檔案當下有沒有工作表,沒有的話需要建立;有的話只需要取得,然後存到變數供後續流程使用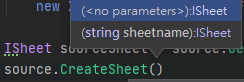

設定儲存格#
遵循著工作表的概念,此處也是需要新建或是取得的概念,使用列(ROW)及儲存格(Cell) 具體的做法請參看下列程式碼
IWorkbook workbook = new XSSFWorkbook();
ISheet workSheet = workbook.CreateSheet("工作表1");

IRow row = workSheet.CreateRow(0);
ICell cell1 = row.CreateCell(0);
cell1.SetCellValue("column 1");下載檔案#
當我們準備好一個 EXCEL 檔案要匯出,給網站使用者下載,我們可以透過memoryStream將 EXCEL 放到裡面,網路上的做法很多都是用Response.BinaryWrite(exportData.GetBuffer());這樣的方法去做,但是在MVC裡面我們可以直接使用FileResult回傳即可
return File(ms.ToArray(), System.Net.Mime.MediaTypeNames.Application.Octet, fileName);注意事項#
在NPOI裡面可以發現是沒有日期型態的,從實際的 EXCEL 檔案讀取,它的型態會被判斷為數字,必須再透過DateUtil.IsCellDateFormatted方法來判斷是否為日期
應用範例:網站下載 Excel#
前端#
前端的部分核心代碼大概就是下面這段了,透過ajax送出請求,接收到結果之後再建立一個 a 標籤,模擬使用者點擊達到自動下載的效果
/* 匯出 Excel */
downloadExcel(sendData){
  return $.ajax({
    url: `/Demo/DownloadExcel`,
    type: "POST",
    data: sendData,
    xhrFields: {
      responseType: "blob"
    }
  })
}

downloadHandler(){
  downloadExcel(condition).then((response, status, hr) => {
    const $a = document.createElement("a");
    const url = URL.createObjectURL(response);
    const fileName = xhr.getResponseHeader('Content-Disposition').split("=")[1];
    const currentFileName = fileName.replace(/"(.*)"/, "$1");
    $a.download = decodeURI(currentFileName);
    $a.href = url;
    $a.click();
    setTimeout(() => URL.revokeObjectURL(url), 5000)
  })
}後端#
核心代碼是改寫自[.NET][C#]NPOI 產生 Excel 報表(一)列印表頭資訊(xlsx),這份程式的優點是允許接受泛型輸入來產生 EXCEL 檔案,所以 EXCEL 欄位的順序會與輸入的泛型屬性順序相關,但是若直接依照原文的方法產生出來的 EXCEL,再開啟的時候會提示錯誤NPOI 已移除的記錄: /xl/workbook.xml 部分的 文件佈景主題 (活頁簿),研究了很久始終沒有頭緒,最終的解決方案是參考官網範例:CopySheet(複製工作表),改寫後就正常了。
順便查到其實
xlsx檔案就是zip檔案,可以解壓,修改內容後再壓回zip也行,不過正常人還是不要用這招,因為後續你也不能做什麼有用的事情
// DemoController
public FileResult DownloadExcel()
{
    // 取得匯出資料
    List<ExcelInfo> excelData = GetMyExcelData();

    // 匯出資料 -> EXCEL
    string templatePath = Server.MapPath("~/App_Data/templateOrderQA.xlsx");
    IWorkbook workbook = new ExcelModule().GenerateExcel(templatePath, excelData, 1);
    MemoryStream ms = new MemoryStream();
    workbook.Write(ms);

    // EXCEL -> Download
    var fileName =
        HttpUtility.UrlEncode($"匯出資料{DateTime.Now:yyyy-MM-dd_HHmmss}.xlsx", System.Text.Encoding.UTF8);
    return File(ms.ToArray(), System.Net.Mime.MediaTypeNames.Application.Octet, fileName);
}
// ExcelModule
public class ExcelModule
{
public IWorkbook GenerateExcel<T>(string templatePath, List<T> entities, int offset)
{
IWorkbook target = new XSSFWorkbook();
IWorkbook source =
new XSSFWorkbook(new FileStream(templatePath, FileMode.Open, FileAccess.Read, FileShare.ReadWrite));
ISheet sourceSheet = source.GetSheetAt(0);
sourceSheet.CopyTo(target, sourceSheet.SheetName, true, true);
ISheet targetSheet = target.GetSheetAt(0);
List<ICell> templateCells = targetSheet.GetRow(offset).Cells;
PropertyInfo[] properties = typeof(T).GetProperties();
foreach (var entity in entities)
{
targetSheet.CreateRow(offset);
int cellInRow = 0;
foreach (var property in properties)
{
ICell cell = targetSheet.GetRow(offset).CreateCell(cellInRow);
cell.CellStyle = templateCells[cellInRow].CellStyle;
cell.SetCellType(templateCells[cellInRow].CellType);
var currentValue = property.GetValue(entity, null);
switch (templateCells[cellInRow].CellType)
{
case CellType.Numeric:
if (currentValue == null) break;
if (DateUtil.IsCellDateFormatted(templateCells[cellInRow]))
{
cell.SetCellValue(Convert.ToDateTime(currentValue));
}
else
{
cell.SetCellValue(Convert.ToDouble(currentValue));
}
break;
case CellType.String:
cell.SetCellValue(Convert.ToString(currentValue));
break;
default:
cell.SetCellValue(Convert.ToString(currentValue));
break;
}
cellInRow++;
}
offset++;
}
return target;
}
}測試#
這裡的測試一樣是改寫自[.NET][C#]NPOI 產生 Excel 報表(一)列印表頭資訊(xlsx),但這個測試應該不算是單元測試,充其量只能是用來測試看看我們的模組是否可以順利產生 Excel 檔案,所以測試功能正常後,應該還是把它砍掉,專案會比較乾淨
 [TestClass]
    public class ExcelModuleTests
    {
        [TestMethod]
        public void GenerateExcelFileTest()
        {
            //(1)製造測試資料
            List<Poker> pokers = new List<Poker>();
            for (int i = 0; i < 10; i++)
            {
                pokers.Add(new Poker {Id = 1, Name = "David", Title = "King", Color = "Spades", Balance = 1000});
                pokers.Add(new Poker {Id = 2, Name = "Charlemagne", Title = "King", Color = "Hearts", Balance = 2000});
                pokers.Add(new Poker {Id = 3, Name = "Caesar", Title = "King", Color = "Diamonds", Balance = 3000});
                pokers.Add(new Poker {Id = 4, Name = "Alexander", Title = "King", Color = "Clubs", Balance = 4000});
                pokers.Add(new Poker {Id = 5, Name = "Athena", Title = "Queen", Color = "Spades", Balance = 5000});
                pokers.Add(new Poker {Id = 6, Name = "Judith", Title = "Queen", Color = "Hearts", Balance = 6000});
                pokers.Add(new Poker {Id = 7, Name = "Rachel", Title = "Queen", Color = "Diamonds", Balance = 7000});
                pokers.Add(new Poker {Id = 8, Name = "Argine", Title = "Queen", Color = "Clubs", Balance = 8000});
            }

            //(2)產生報表
            string templateFile = @"TestHelper\myTemplate.xlsx";
            string ReportPath = @"D:\temp\output.xlsx";
            var sut = new ExcelModule();
            IWorkbook workbook = sut.GenerateExcel(templateFile, pokers, 1);
            using (FileStream fileOut = new FileStream(ReportPath, FileMode.Create))
            {
                workbook.Write(fileOut);
            }
            Assert.AreEqual(true, File.Exists(ReportPath));
        }
    }

    public class Poker
    {
        public int Id { get; set; }
        public string Name { get; set; }
        public string Title { get; set; }
        public string Color { get; set; }
        public Decimal Balance { get; set; }
}結論#
NPOI 的使用其實沒有想像中困難,只是麻煩一點而已,而儲存格的樣式設定則是另外一個討人厭的事情,透過 Template 的方式可以省去很多工,但如果要客製許多樣式還是需要慢慢手刻,不過若以基本的檔案匯出功能來看,到這邊應該就差不多了