這一篇文章主要是針對 cypress.io + cucumber 的介紹
How To Start#
安裝 cypress-cucumber-processor 套件
npm install cypress-cucumber-preprocessor --save-dev指定預處理器
// cypress/plugins/index.js
const cucumber = require("cypress-cucumber-preprocessor").default;

module.exports = (on, config) => {
  on("file:preprocessor", cucumber());
};讓cypress支援feature檔,並且忽略*.js這樣就只顯示 feature 的測試檔案,而不會有其他js檔案的干擾
// cypress.json
{
  "testFiles": "**/*.feature",
  "ignoreTestFiles": ["*.js"]
}同時在package.json加入下列的設定區段
"cypress-cucumber-preprocessor": {
  "nonGlobalStepDefinitions": true
}
上面的設定其實牽涉到了傳統的 cucumber 問題,也就是所有的東西都是global
- 撰寫測試步驟定義的時候,你必須確保不會跟其他定義衝突,這一點在大型專案特別困擾
- 也因為所有的東西都是
global,導致執行測試的時候,所有東西都需要掃過一次,這將造成效能問題
如果不改變其他設定的話,依照這樣做下來,在一些可以共用的 step 定義,可以存放在
cypress/integration/common資料夾下
撰寫測試檔案的規則
- 所有
feature檔案都必須在cypress/integration目錄下 - 在
feature檔相同層級,建立一個與其相同名稱的資料夾作為存放 step 定義的地方
撰寫測試的範例如下
import { Given, When, Then } from 'cypress-cucumber-preprocessor/steps';
Given(/^One given step$/, () => {
   ...
});
Given(/^another given step$/, () => {
   ...
});

When(/^Some other when step$/, () => {
  ...
});

Then(/^I have some results$/, () => {
  ...
});cucumber#
IDE 支援 cucumber 的程度#
套件本身有一些高亮、其他功能支援,但我覺得比較重要的功能就是能夠在feature檔,透過F12的快捷鍵,跳至step定義
如果用Rider開發,可以直接透過Ctrl+Alt+S叫出設定,並將cucumber外掛裝好
如果是VSCode,就安裝Cucumber (Gherkin) Full Support,並且設定一下定義檔的路徑
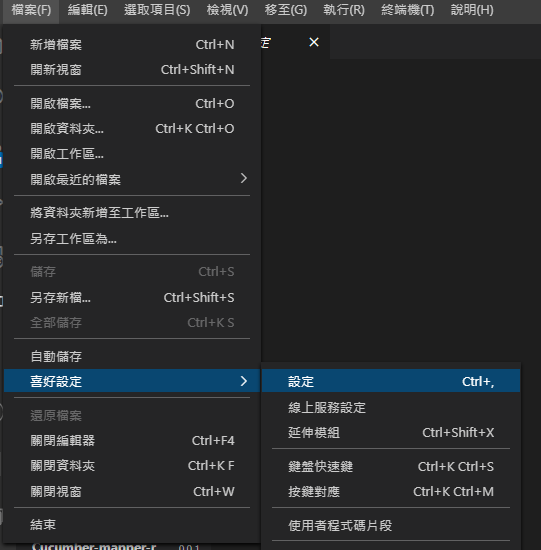
Json格式進行編輯
因為 cypress 的定義檔放在規定的路徑下,所以加入了cypress/integration/**/*.js
{
    "cucumberautocomplete.steps": [
        "cypress/integration/**/*.js",
        "test/features/step_definitions/*.js",
        "node_modules/qa-lib/src/step_definitions/*.js"
    ],
	"cucumberautocomplete.strictGherkinCompletion": true
}
此處我們透過新增一個簡單的測試案例來練習如何透過 IDE 提供的功能方便我們撰寫
一開始先新增一個feature檔案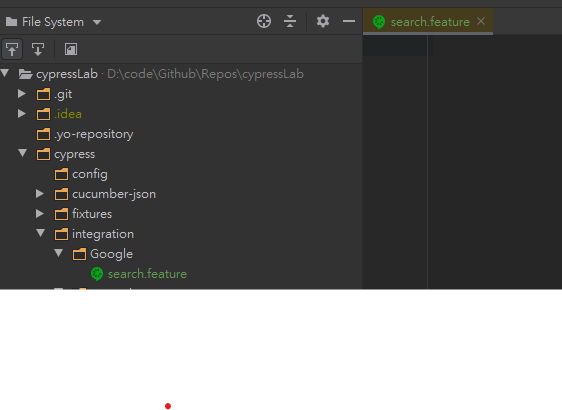
當然因為cypress-cucumber-preprocessor的關係,我們需要把定義檔放在同名的子目錄下,所以我也建立了一個Search目錄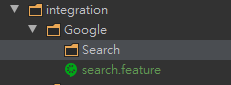
接著完成這份測試
Feature: Google Search Test

  Scenario: 搜尋測試
    Given 瀏覽 Google 首頁
    When 我輸入 art的辦公桌
    Then 會出現搜尋結果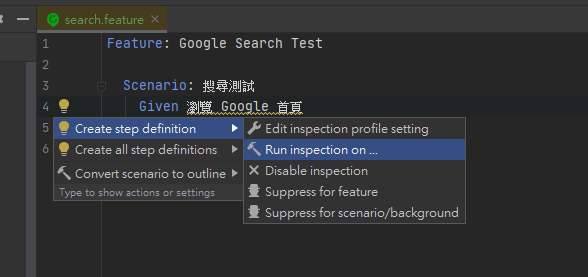
Alt+Enter,叫出 Rider 的快速選單,選擇 Run inspection on的選項,他會詢問你檢查定義檔的範圍在哪裡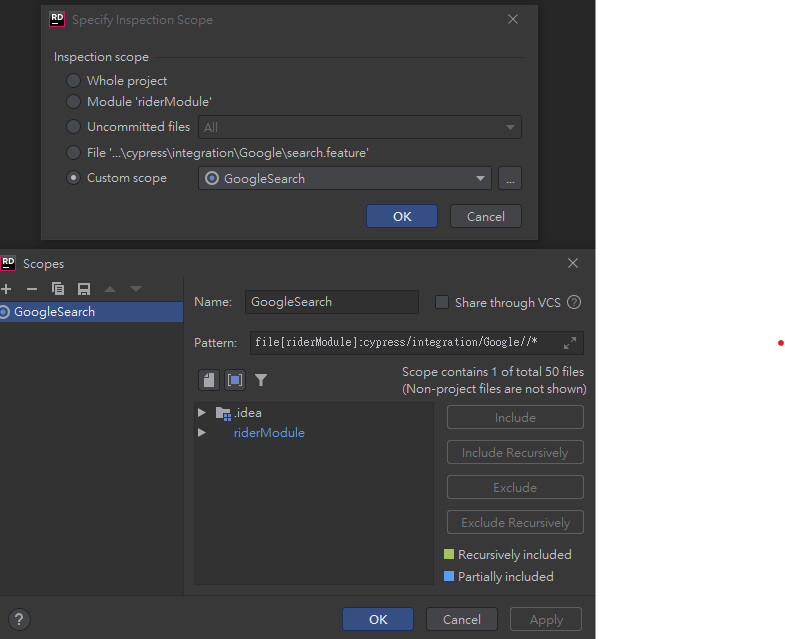
Scope叫做GoogleSearch,指定目錄,讓他去找這個Scope底下有沒有符合我feature檔描述的Step 定義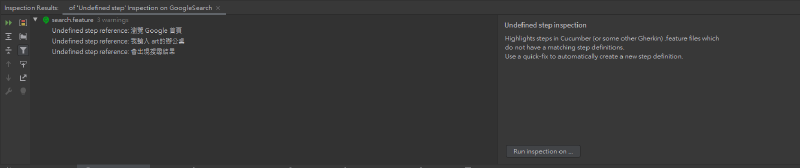
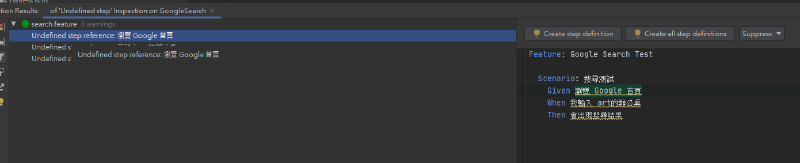

接著他會出現下面的視窗,記得調整定義檔輸出的目錄及檔案名稱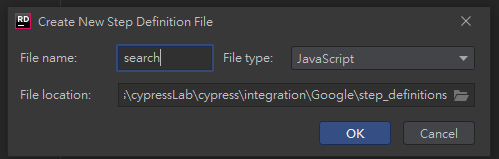
它會自動幫你建立對應的 Step 檔案,只是自動建立的是針對cucumber,並非我們使用的cypress-cucumber-preprocessor,所以還是需要自己調整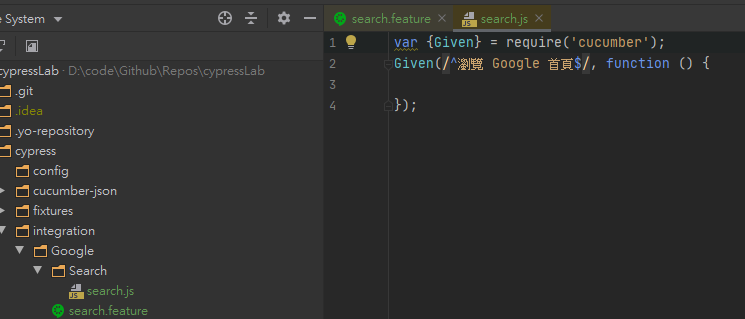
var { Given, Then, When } = require("cypress-cucumber-preprocessor/steps");

Given(/^瀏覽 Google 首頁$/, function () {
  console.log("step1");
});
When(/^我輸入 art的辦公桌$/, function () {
  console.log("step2");
});
Then(/^會出現搜尋結果$/, function () {
  console.log("step3");
});
接著我們看一下執行結果
測試框架有順利執行定義,接著就可以填充每個定義的內容
var { Given, Then, When } = require("cypress-cucumber-preprocessor/steps");

const SEARCH_FIELD = "input[type=text]";
const SEARCH_BUTTON = "input[type=submit]";

class GoogleSearchPage {
  static visit() {
    cy.visit("http://www.google.com");
  }

  static type(query) {
    cy.get(SEARCH_FIELD).type(query);
  }

  static pressSearch() {
    cy.get(SEARCH_BUTTON).contains("Google 搜尋").click({ force: true });
  }
}

const RESULT_LINK = "h3";
class GoogleResultsPage {
  static expect() {
    return {
      toHaveResults: () => {
        cy.get(RESULT_LINK)
          .its("length")
          .then((length) => {
            expect(length).to.be.greaterThan(5);
          });
      },
    };
  }
}

Given(/^瀏覽 Google 首頁$/, function () {
  GoogleSearchPage.visit();
});
When(/^我輸入 art的辦公桌$/, function () {
  GoogleSearchPage.type("art的辦公桌");
  GoogleSearchPage.pressSearch();
});
Then(/^會出現搜尋結果$/, function () {
  GoogleResultsPage.expect().toHaveResults();
});
使用 Gherkin 撰寫測試案例#
使用 BDD 方式撰寫測試案例,與一般的測試案例不太一樣;一般來說我們可能會有類似下面這樣的測試案例
describe("搜尋測試", () => {
  it("搜尋業務 art 應該會出現 1 筆資料", async function () {
    var expected = 1;
    await SearchPageObject.Search({ search: "art" });
    let result = await SearchPageObject.GetResult();
    var actual = result.data.length;
    assert.equal(actual, expected);
  });
});
我們的重點可能會放在程式的輸入、輸出,結構通常會以 3A 原則:arrange、act、assert 來編排,但是不論將上述的測試程式如何的拆分職責,語意化,始終不如直接用我們熟悉的自然語言來得更直接 但是我個人認為,這樣的方式放在 e2e 測試案例,就有點不合時宜,因為 e2e 測試主要是為了要模擬使用者對網站真實的操作,這也能讓我在撰寫測試的時候將注意力放在使用者的行為,而不是程式的行為
在如何撰寫的部分,可以看一下下面這兩篇文章,會比較有概念
撰寫測試的建議#
使用 data-* attribute#
一直以來撰寫程式碼的時候都希望能夠不要重複,最根本的原因就是因為如果寫錯了,相同的東西可能要改很多次。那麼如果今天是 HTML 有東西改了呢?
cypress.io 的best practice也有提到,給予 DOM 一個data-*的 attribute 用在 selector 是比較推薦的做法
文章下方表格也說明了各種 selector 語法的缺點,並解釋了為甚麼不要這樣做、這樣做為什麼不夠好
Best Practice這種東西之所以會出現,意味著這些都是從別人的失敗經驗裡面歸納出來的好辦法。
使用 page object pattern#
page object的部分有一篇文章或許可以給大家參考一下:Stop using Page Objects and Start using App Actions
依據不同環境執行測試#
預設cypress會使用專案根目錄下的cypress.json,但是我們可以透過下面的方式來覆蓋掉預設設定值
// cypress/plugins/index.js
const { cypressConfigResolver } = require("../config/cypress-config-resolver");
module.exports = (on, config) => {
  on("file:preprocessor", cucumber());
  return cypressConfigResolver();
};
// cypress/config/cypress-config-resolver.js
const fs = require("fs-extra");
const path = require("path");
const cypressConfigResolverByFile = (filename) => {
const pathToConfigFile = path.resolve(__dirname, `${filename}.json`);
return fs.readJsonSync(pathToConfigFile);
};
const cypressConfigResolver = () =>
cypressConfigResolverByFile(process.env.CYPRESS_ENV || "localhost");
module.exports.cypressConfigResolver = cypressConfigResolver;相對應的,也要為環境建立一個自己的設定檔,在Windows作業系統之下,設定環境變數可以利用SET指令,接著在程式內就可以利用process.env.xxxx的方式取得環境變數
// package.json
{
	"scripts": {
		"cy:open:localhost": "SET CYPRESS_ENV=localhost && npm run cy:open",
		"cy:open:lab": "SET CYPRESS_ENV=lab && npm run cy:open",
		"cy:open": "cypress open",
	}
}
// cypress/config/localhost.json
{
"baseUrl": "https://www.google.es"
}// cypress/config/production.json
{
"baseUrl": "https://www.google.com"
}執行某些特定的測試#
我們可以在平常開發的時候撰寫一些 e2e 測試,但如果所有測試都拿去跑的話,可能就沒有那麼必要,這時候在 CI 上面跑一些冒煙測試,是比較可行的方案
冒煙測試僅僅是在短時間廣泛地覆蓋產品功能。如果關鍵功能無法正常工作或關鍵 bug 尚未修復,那麼你們的團隊就不需要浪費更多時間去安裝部署以及測試。,則煙霧測試將在有限的時間內廣泛涵蓋產品功能。不會浪費更多的時間來安裝或測試 – wiki
在這樣的情況下我們可以透過指定 TAGS 來將測試的範圍限縮,語法範例如下
//package.json
{
	"cy:run1": "cypress run --env TAGS='@e2e-test' --spec 'cypress/integration/**/*.feature'",
	"cy:run2": "cypress run --headless --browser chrome --spec 'cypress/integration/moneyIn/orderqaSearch.feature,cypress/integration/moneyIn/orderqaCreate.feature'"
}
安裝了套件之後,執行完測試也會產生相對應的報告資料 json 檔案,後續就可以利用這個檔案產生報告
附帶一提,在透過command line執行cyrpess run指令,在我的環境下總是會出現一些錯誤,像是cypress Timed out waiting for the browser to connect. Retrying;或者是could not find CRI target / Failed to connect to Chrome,但如果僅是透過cypress open,手動執行測試案例,是沒有問題的,問題可能出在headless模式底下
從這一點來看,也許cypress還不是很穩定
產生測試報告#
這裡採用的是cucumber-html-reporter,這個套件能夠幫你把cypress-cucumber-preprocessor測試產生的數據,拿來產生 HTML 格式的報告
Generate Json#
設定package.json,使其產生測試數據
// package.json
{
  "cypress-cucumber-preprocessor": {
    "nonGlobalStepDefinitions": true,
    "cucumberJson": {
      "generate": true,
      "outputFolder": "cypress/cucumber-json",
      "filePrefix": "",
      "fileSuffix": ".cucumber"
    }
  }
}Install#
安裝報告的套件
npm install cucumber-html-reporter --save-devcucumber.js 的版本差異,會需要找到支援的 cucumber-html-reporter 安裝
Usage#
建立一個cucumber-html-reporter.js檔案,之後給node呼叫產生報告用
// cucumber-html-reporter.js
const reporter = require("cucumber-html-reporter");

const options = {
  theme: "hierarchy", // Available: ['bootstrap', 'hierarchy', 'foundation', 'simple'] Type: String
  jsonDir: "cypress/cucumber-json",
  output: "reports/cucumber_report.html",
  reportSuiteAsScenarios: true,
  scenarioTimestamp: true,
  launchReport: true,
  ignoreBadJsonFile: true,
  scenarioTimestamp: true,
  metadata: {
    "App Version": "1.0.0",
    "Test Environment": "STAGING",
    Browser: "Chrome  54.0.2840.98",
    Platform: "Windows 10",
    Parallel: "Scenarios",
    Executed: "Remote",
  },
};

reporter.generate(options);設定的部分還是需要前往官網看看說明文件的,不過其實metadata的資訊都可以自訂,就看需求來處理囉
下面是故意讓測試案例失敗的例子,畫面會顯示錯誤原因,以及相關的程式行數,如果 step 成功的話會是綠色的,失敗則會是紅色,當然如果沒有改設定的話,失敗的測試案例也會截圖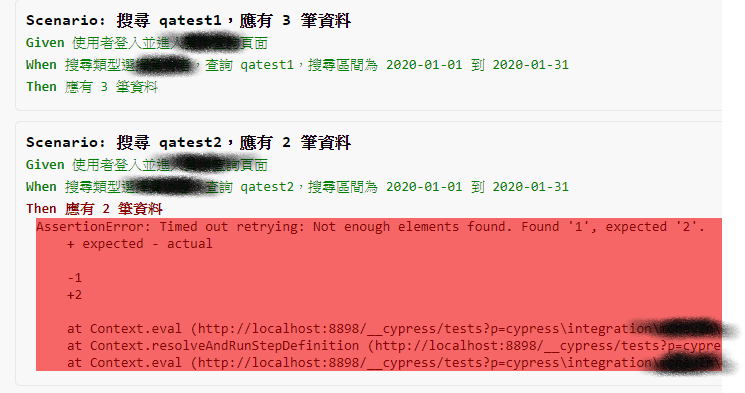
資料來源#
How to integrate Cypress and Cucumber in your development flow in just a few weeks.
如果對英文不苦惱,強烈建議前往原文瀏覽,這篇文章大部分都是原文的補充及心得
cypress-cucumber-preprocessor github
學習、使用工具最重要的事情就是看說明書了,對吧